
Have your kitchen knives lost their sharpness? Therefore, knowing how to sharpen kitchen knives is crucial for you. Cooking with a sharp knife enhances your experience and ensures safety and precision. Using a dull knife can make meal preparation frustrating and even dangerous. This guide will teach you how to sharpen kitchen knives properly by following the key steps and techniques.
The art of knife sharpening can elevate your culinary skills, regardless of your experience. Let’s make kitchen knives more efficient and sharper!
When to Sharpen Your Kitchen Knives
It’s crucial to keep your kitchen knives sharp when preparing meals. Here are some signs that your kitchen knives need sharpening:
- Dull Blade: You should sharpen your knife if it struggles to cut through food smoothly and requires more force than usual.
- Torn or Bruised Food: The blade is not sharp enough if your knife crushes or tears food instead of making clean cuts.
- Uneven Slices: A sharp knife lets you slice food precisely and uniformly. If you’re struggling to achieve consistent slices, it’s time to sharpen your knife.
- Increased Slippage: Sharp knives are easier to grip and control. When cutting, a dull blade will cause the knife to slip off the food’s surface.
- Notch Formation: A nick or notch along the blade’s edge indicates that your knife needs sharpening.
You’ll cook efficiently and safely by recognizing these signs and sharpening your knives promptly.
How to Sharpen Kitchen Knives with a Stone
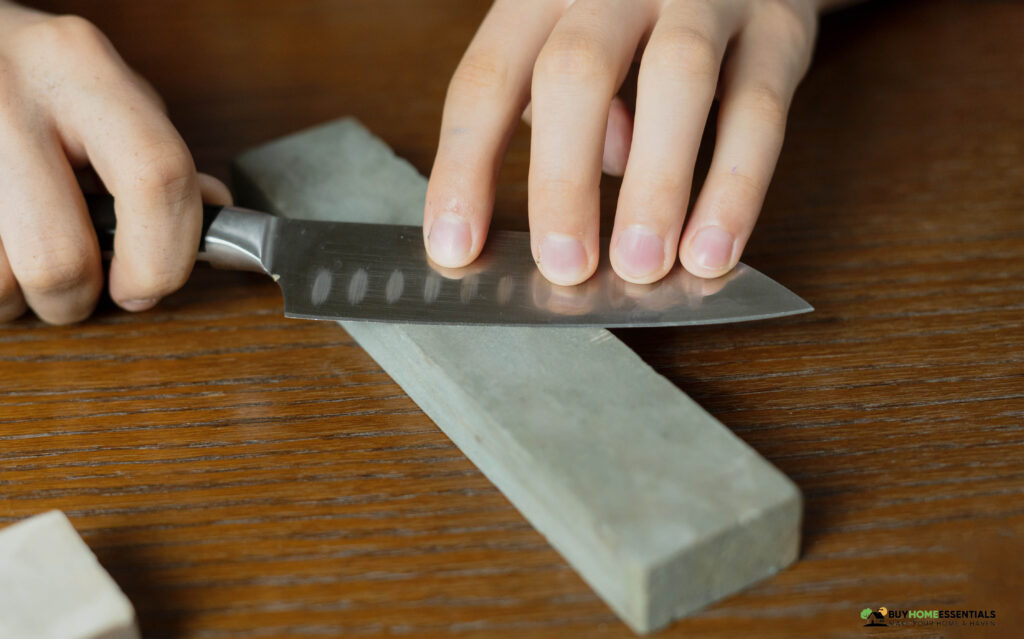
You can sharpen your kitchen knives with a traditional and effective whetstone. Follow these steps to achieve a sharp edge on your knives:
- Select an appropriate whetstone based on the level of sharpening needed (coarse, medium, fine grit).
- Place a damp towel or non-slip base under the whetstone to keep it steady during sharpening.
- Immerse the whetstone in water for the specified amount of time. It ensures proper lubrication and prevents the stone from drying out.
- Place the whetstone on a stable surface, ensuring it won’t move during sharpening. Position the stone with the coarse side facing up for initial sharpening.
- Grip the knife handle firmly with your dominant hand, placing your fingertips on the blade for stability.
- Hold the blade against the stone at the appropriate angle. For most kitchen knives, a 20-degree angle is suitable. Maintain this angle throughout the sharpening process.
- Glide the knife across the stone in a sweeping, curved motion, maintaining the angle. Apply even pressure and cover the entire length of the blade.
- After several strokes, flip the knife and repeat the same number of strokes on the opposite side to maintain an even edge.
- Test the knife’s sharpness by carefully running your fingertip across the blade’s edge. If it feels smooth and sharp, proceed to the finer grit side of the stone for additional sharpening.
- Finish using a finer grit side of the stone to hone and polish the edge, ensuring a razor-sharp finish.
- After sharpening, clean the knife thoroughly to remove any metal filings. Dry it and store it in a safe, dry place.
Regularly sharpening your kitchen knives with a whetstone will maintain their sharpness, making meal preparation a breeze.
How to Sharpen Kitchen Knives With Rod
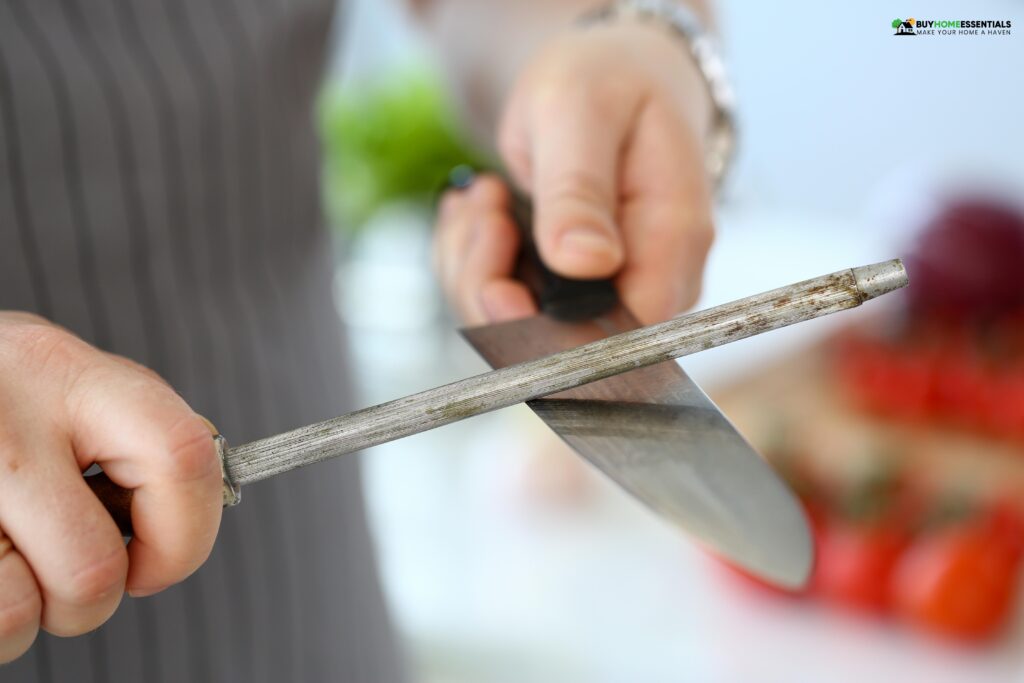
You can maintain and fine-tune the edge of your kitchen knives with a sharpening rod, also called honing steel. You can sharpen your knives with a sharpening rod by following these steps:
- Get the right sharpening rod for your knives. Ensure it is longer than the blade you intend to sharpen.
- Place the honing steel vertically in a secure position on a countertop or in a honing steel holder.
- Hold the knife handle firmly with your dominant hand, and grip the honing steel’s handle with your non-dominant hand.
- Position the sharpening rod perpendicular to the surface. Maintain a 20-degree angle between the knife blade and the rod.
- Place the base of the knife blade against the top of the sharpening rod, ensuring the entire edge contacts the rod.
- Swipe the knife down the rod while maintaining an angle at the base of the blade. Use a gentle, controlled motion to cover the entire blade length.
- Repeat the swiping motion, alternating sides to ensure an even sharpening of the knife edge. Aim for the same number of strokes on each side.
- Test the knife’s sharpness by gently running your fingertip along the blade. If it feels sharp and smooth, you’ve achieved the desired sharpness.
- After sharpening, clean the knife to remove any metal filings. Dry it thoroughly and store it in a safe, dry place.
How to Sharpen Kitchen Knives With Electric Sharpener
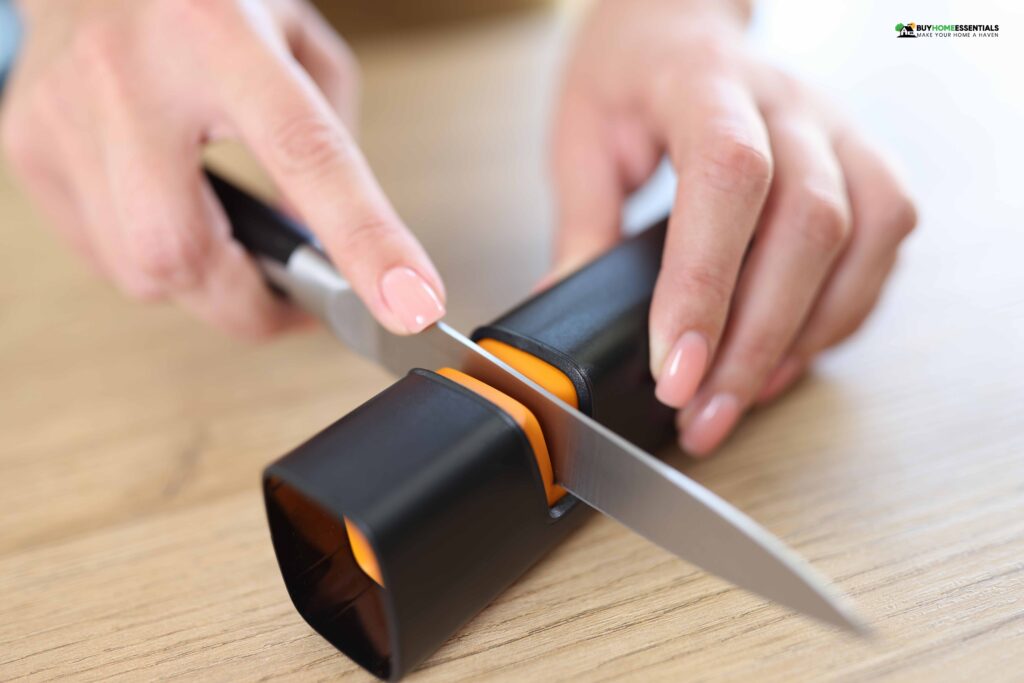
Sharpening kitchen knives with an electric sharpener is easy and efficient, especially if you want it fast and precise. Here’s how to sharpen knives with an electric sharpener:
- Place the electric sharpener on a flat surface and plug it into a power outlet.
- Most electric sharpeners have multiple slots with varying grits. Choose the appropriate slot for your knife. Initial sharpening uses coarser grits, while polishing uses finer grits.
- Hold the knife handle securely and insert the blade’s heel into the appropriate slot, following the sharpener’s instructions.
- Turn on the electric sharpener. Pull the knife through the slot, ensuring the blade remains in contact with the abrasive material.
- Depending on the sharpener, you may need to repeat the process on the other side of the blade.
- Run your fingertip along the knife’s blade to check its sharpness. When it feels sharp and smooth, you have achieved the desired sharpness.
- You can refine the edge with the honing stage on the electric sharpener.
- After sharpening, clean the knife to remove any metal filings.
- Dry the knife thoroughly and store it in a safe, dry place.
Honing vs. Sharpening
Honing maintains the straightness and sharpness of the blade by realigning its edge without removing metal. It corrects slight misalignments caused by regular use, ensuring an effective cutting edge. The honing steel is commonly used to uphold sharpness before or after each use to maintain sharpness.
In contrast, sharpening involves removing metal from an edge to create a new, sharp one. Sharpening is necessary when honing won’t restore a dull knife’s sharpness. It is a restorative process, as opposed to honing. Whetstones, sharpening rods, and electric sharpeners are all used to reshape blades at different abrasive levels.
How to Sharpen Kitchen Knives: Common Mistakes to Avoid
Sharpening your kitchen knives isn’t easy; you can make many mistakes that could damage the blade. Here are some pitfalls to avoid:
- Incorrect Angle: One of the most common mistakes is not maintaining a consistent sharpening angle. A consistent angle is crucial for achieving a sharp edge.
- Excessive Pressure: Excessive pressure can lead to uneven edges and wear down the blade faster. Let the sharpening tool do the work.
- Skipping Grits: Not progressing through the appropriate grits can result in a dull edge when using a whetstone. Start with a coarse grit and move to finer grits for optimal sharpness.
- Uneven Sharpening: The blade will perform poorly if not sharpened evenly throughout its length.
- Overuse of Electric Sharpeners: Using an electric sharpener excessively can reduce the lifespan of knives and remove excess material.
- Neglecting Knife Maintenance: After sharpening your knives, they will dull quickly if you don’t clean and store them properly.
Follow proper sharpening techniques to extend the life of your knives and maintain a sharp, effective cutting edge.
FAQs
What oil is used to sharpen the knife?
When sharpening a knife, it is common to use honing or mineral oil to lubricate a whetstone or sharpening stone. The oils reduce friction and keep the stone from clogging with metal particles, which can affect sharpening.
Is oil better than water for knife sharpening?
Sharpening knives with oil or water depends on the type of sharpening stone and personal preference. The oil provides adequate lubrication, reducing friction and preventing clogging with metal particles during sharpening. You can use it on oilstones or Arkansas stones to extend their lifespans.
The convenience and easy cleaning of water make it an excellent choice for use with water stones or whetstones. It’s readily available and practical for various settings, especially when oil is not easily accessible. Stone type and the desired sharpening experience ultimately determine whether to use oil or water for a smoother sharpening process.
The Takeaway
It’s essential for any culinary enthusiast to master knife sharpening. In the kitchen, a sharp knife enhances efficiency and ensures safety. Choosing the right sharpening tools and adopting proper techniques are crucial to maintaining a sharp blade. The key to regular upkeep is honing for maintenance and sharpening for restoration.
Keep your kitchen knives sharp by avoiding common mistakes and choosing the proper sharpening method. Using this guide, you will achieve razor-sharp precision, elevating your cooking skills.


