
Are you wondering how to paint kitchen cabinets? You’re in the right place. This post will show you how to paint kitchen cabinets professionally. In addition to being a place to cook, your kitchen is a place for creativity and comfort. As a prominent feature, the cabinets are essential in shaping its aesthetics.
Painting kitchen cabinets can revitalize your kitchen, enhance its ambiance, and reflect your style. This guide will teach you how to achieve a flawless finish step-by-step. Learn how to paint kitchen cabinets like a pro and elevate the heart of your home. Let’s get started.
How to Paint Kitchen Cabinets: Step-by-Step Guide
The following is a step-by-step guide that you should follow to paint your kitchen cabinets.
Step 1: Gather Your Painting Supplies
Having all the necessary supplies before painting your kitchen cabinets is essential. If you have the right tools and materials, it’ll make painting easier and look more professional.
Here are the essential painting supplies you’ll need:
- Paint: Choose a high-quality cabinet paint. The most common paints are latex and oil-based, which provide excellent results.
- Primer: Use a high-adhesion, stain-blocking primer specifically designed for painting cabinets. The primer improves the adhesion of the paint and smooths out the surface.
- Paint Brushes and Rollers: Use high-quality brushes and rollers to apply the paint evenly. It’s best to use brushes for details and rollers for larger areas.
- Sandpaper or Sanding Blocks: Use fine-grit sandpaper (e.g., 120-220 grit) to smooth the cabinet surfaces. Proper paint adhesion requires sanding.
- Painter’s Tape: Use painter’s tape to protect areas you don’t want to paint, such as hinges or glass panels.
- Drop Cloths or Plastic Sheets: Use drop cloths or plastic sheets to prevent paint splatters on your floors.
- Cleaning Supplies: Before painting, clean the kitchen cabinets with rags, mild detergent, and water.
- Screwdriver or Drill: Remove cabinet hardware like knobs, handles, and hinges with a screwdriver or drill.
- Wood Filler and Putty Knife: Fill any holes or cracks in the cabinet surfaces with wood filler and a putty knife.
- Tack Cloth: After sanding and before painting, use a tack cloth to remove any dust or debris.
Step 2: Disassemble Cabinet Doors, Drawer Fronts, and Hardware
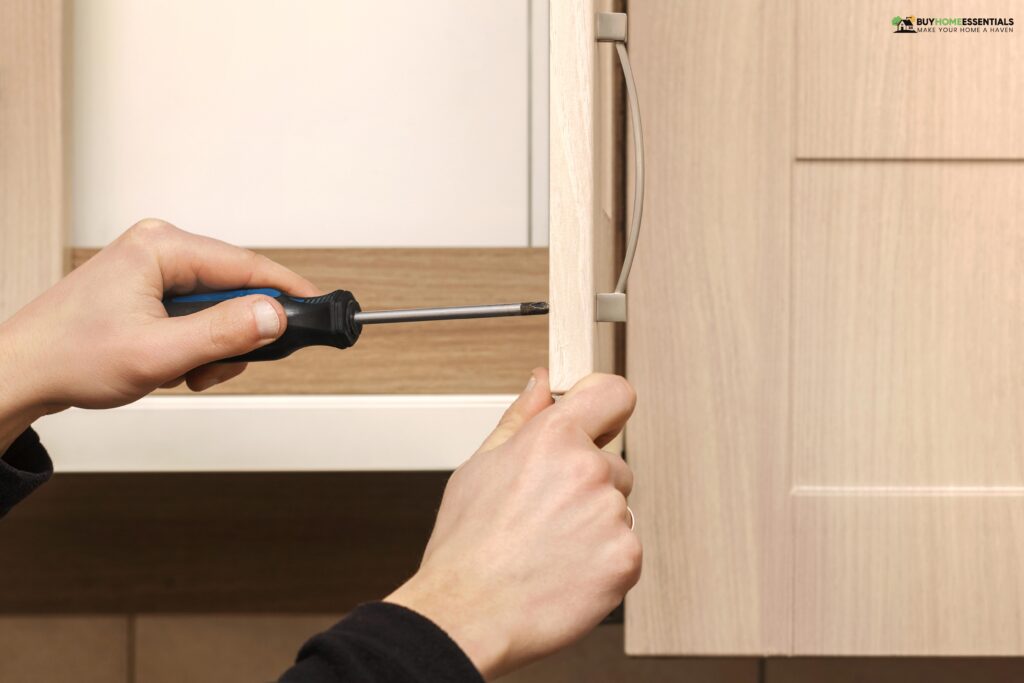
Label each cabinet door and location using removable painter’s tape or sticky notes. It will simplify the reassembly process later on. Remove all knobs, handles, hinges, and other hardware from cabinet doors and drawer fronts with a screwdriver or drill. Keep the hardware organized in plastic bags or containers with labels.
Next, open the cabinet doors and take out any shelves. Unscrew and detach cabinet doors and drawer fronts from their hinges. Put them flat in a clean, well-ventilated area so you can paint them.
Step 3: Clean the Cabinet

For a smooth, long-lasting finish, you must thoroughly clean kitchen cabinets before applying primer or paint. It helps remove grease, grime, and other stuff hindering paint adhesion.
Follow these steps to clean your kitchen cabinet effectively:
- Use a dry cloth or a vacuum with a brush attachment to clean the cabinet surfaces.
- Mix a mild detergent or grease-cutting dish soap with warm water in a bucket. Dip a sponge or soft cloth into the cleaning solution and gently wash all cabinet surfaces, including doors, drawer fronts, and frames.
- Especially pay attention to grease-covered areas near the stove. Use a little more cleaning solution and gentle scrubbing for effective grease removal.
- Using a damp cloth, wipe down the cabinets to remove any soap residue. After that, thoroughly dry the surfaces with a dry cloth.
- Use a degreaser to remove grease and grime from cabinet hardware if necessary. Reattach hardware after rinsing and drying.
Related: How to Clean Kitchen Cabinets
Step 4: Repair Nicks and Scratches with Wood Filler

A flawless paint finish on kitchen cabinets requires addressing imperfections like scratches and nicks. You can fix these blemishes with wood filler, ensuring a smooth and even painting surface.
Follow these steps to use wood filler effectively:
- Ensure you have wood filler, a putty knife, and a damp cloth.
- Use a damp cloth to wipe off dust and debris from the scratches and nicks.
- Take a putty knife and scoop some wood filler onto it. Gently press the filler into the damaged areas, filling in the imperfections.
- Smooth the wood filler with the putty knife and level it with the cabinet surface. Make sure there is no excess filler on the surface.
- Follow the manufacturer’s instructions for allowing the wood filler to dry completely. The drying time may vary.
- When dry, sand the repaired areas with fine-grit sandpaper until they’re smooth and blend in.
Step 5: Sand Your Cabinet Doors
It is essential to sand the cabinet doors before applying a fresh coat of paint. You need fine-grit sandpaper (approximately 220 grit), a sanding block, safety goggles, and a dust mask. Sand the entire surface of the cabinet doors, following the grain of the wood with gentle strokes.
Smooth out areas with visible imperfections, rough spots, or uneven surfaces. Round the edges and corners a little to prevent sharp edges. Remove dust and debris after sanding the doors with a clean, damp cloth.
Run your hand over the surfaces to ensure they’re smooth and ready for next steps. The proper sanding prepares your cabinet doors for a professional-looking paint finish.
Step 6: Apply a Coat of Primer

After you have sanded and cleaned your cabinet doors, it’s time to apply primer. You need a primer because it makes the paint adhere better, enhances color durability, and blocks stains.
Ensure your workspace has proper ventilation. Apply a thin, even coat of stain-blocking primer designed for cabinets with a high-quality brush or roller. Apply the primer from the top to the bottom, allowing it to dry as the manufacturer directs.
Step 7: Sand the Cabinet Doors Again
Once the primer has dried, lightly sand the cabinet doors again. Sand the primed surfaces gently with fine-grit sandpaper (around 220-grit). After applying the primer, this step removes any raised grain, imperfections, or brush marks left behind. It’s all about getting a perfect, smooth, uniform surface for painting.
After you sand the doors, wipe them down with a clean, damp cloth to remove any sanding residue. Doing this gives you a perfect base for painting your kitchen cabinets.
Step 8: Paint Your Kitchen Cabinets
It’s time to paint once the cabinet doors are prepped and primed. Choose a high-quality paint for cabinets, whether oil- or latex-based. Apply the paint evenly to the cabinet doors using a brush or roller. Focus on achieving a smooth, consistent finish from the inside out.
Follow the manufacturer’s recommended drying times after applying the first coat. Sand lightly between coats to ensure a flawless finish. Then apply a second coat for a durable finish.
Allow the cabinets to dry thoroughly before reassembling the hardware and reattaching the doors. Your kitchen will look fresh and vibrant after painting your cabinets, giving it new life.
Step 9: Install the Cabinet Doors and Hardware Again
You can reassemble your kitchen cabinets after the paint has dried, and you’re happy with the finish. Reattach the cabinet doors, aligning them with their designated places. Don’t overtighten the hinges and screws. Reinstall the drawer fronts using the right screws.
Once the doors and fronts are in place, attach the cabinet hardware knobs, handles, and hinges. If necessary, double-check alignment and functionality.
This step will ensure a smooth reassembly, and you’ll enjoy the updated look of your kitchen once it’s completed.
Faqs
Can I paint over my kitchen cabinets without sanding?
Yes, you can paint over your kitchen cabinets without sanding, but sanding gives you the best results. Sanding removes any existing finish, rough spots, or imperfections from a surface. As a bonus, it makes the primer and paint adhere better, resulting in a longer-lasting and more professional finish.
However, if your cabinets are in good condition and you want a quicker option, you can use a liquid deglosser or a bonding primer. They can help prepare the surface and create a suitable paint base. Consider your cabinets’ condition and the type of finish you want when choosing the method.
How Many Coats of Paint on the Cabinets?
Typically, cabinets need at least two coats of paint to be durable and even. The first coat provides good coverage and adhesion to the primer. A second coat enhances the color richness and durability of the paint by making it look smooth and consistent.
However, how many coats you need depends on the type of paint, the cabinet color, and your desired result. It might take more coats for darker or more intense colors, while lighter colors might need fewer.
Follow the instructions on the paint manufacturer’s website for how many coats you should apply. For best results, allow each coat to dry thoroughly before applying the next.
The Takeaway
Painting your kitchen cabinets is rewarding to breathe new life into your space. You can transform your kitchen cabinets into a visual delight using the knowledge and techniques outlined in this comprehensive guide. Every step is essential to achieving a professional, polished finish, from priming to painting.
Refresh your kitchen’s ambiance and aesthetics with a stunning makeover. Use your imagination and watch it come to life.


